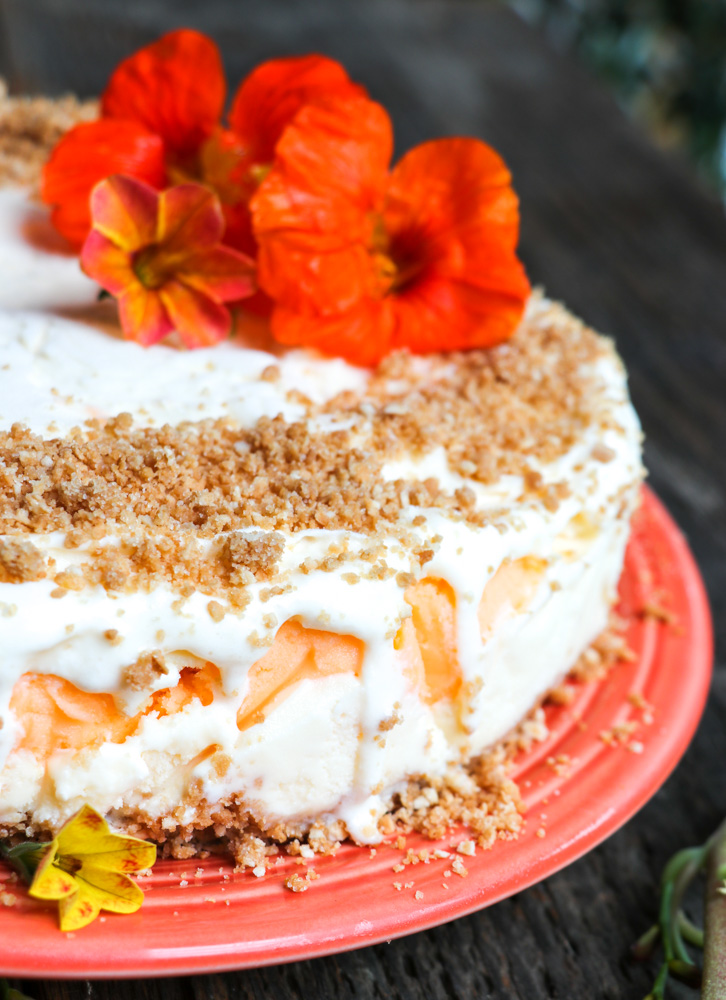
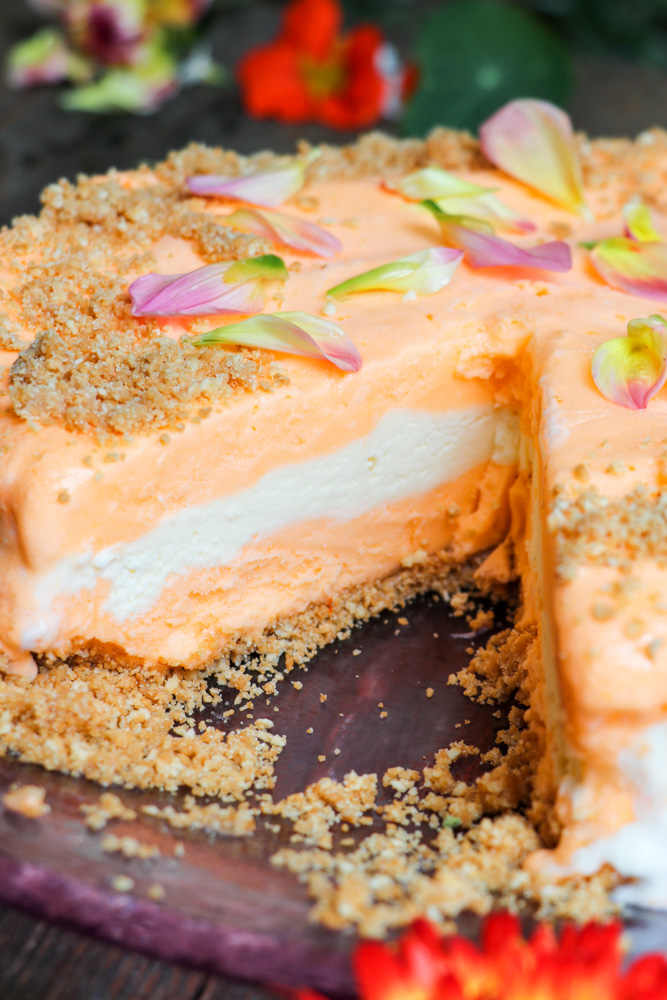
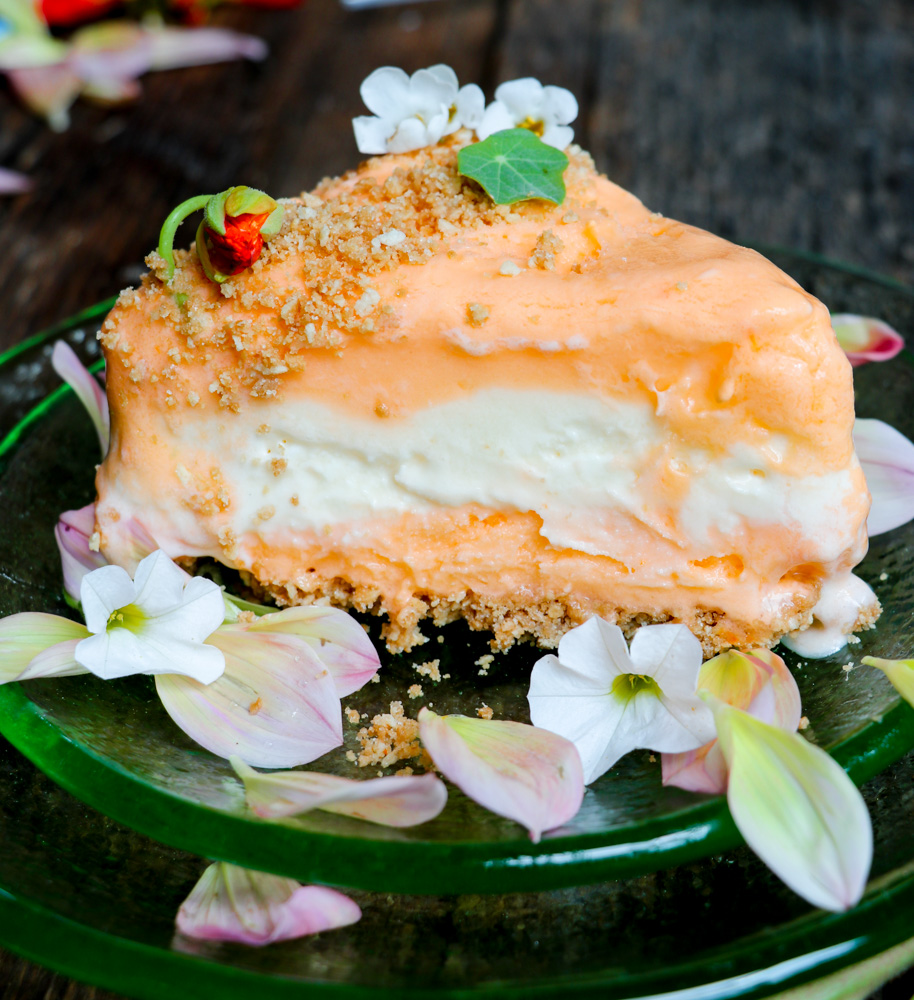
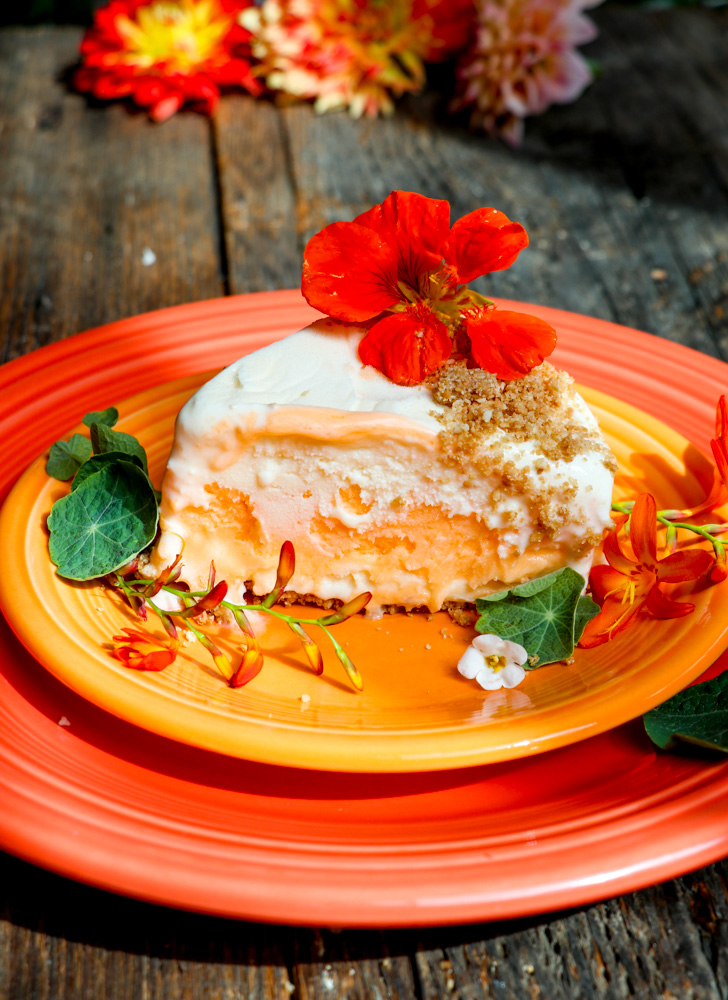
Creamsicle Ice Cream Pie with Waffle Cone Crust
I have fond childhood memories of hot summer days, awaiting the neighborhood ice cream truck. I don’t remember or driver’s name, but I thought was ancient (but since I was 8, he could have been 25), wore a white jacket and hat, and drove a little red convertible around the neighborhood, blaring out some musical tune that could be heard for blocks, drove our parents crazy, and hypnotized all of us into running toward it at full speed. He came fully loaded with a cooler full of any ice cream treats a kid could imagine. It was not easy to decide what to choose, and I’m sure many an ice cream bar was melted with all us hanging over the side of the car, staring into the cooler, mired in indecision. One year, I was fully entrenched in my Drumstick phase, but when I discovered the Creamsicle the following summer, everything else fell away. I still can’t resist that combination of creamy vanilla ice cream and orange sherbet, and since I’m not in a location where I can depend on the ice cream truck every day, came up with this substitute. This pie is as easy as it gets, which is a big plus during the summer. It can stay happy as a clam in your freezer for a couple of weeks or more, waiting for you to get the urge for a treat, and is nice to have for drop-in company. The crust is crumbled waffle cones, held together with melted butter and a little sugar. Then all that’s left to do is grab a couple of containers of ice cream and start layering. The crust is not baked in advance, so the whole thing comes together in a few minutes. I swear I can hear that little ice cream truck tune every time I grab a slice.
Ingredients
- FOR THE CRUST
- 1, 5- ounce package of waffle cones I used Keebler brand in this recipe
- ¼ cup granulated sugar
- ½ teaspoon salt
- 1 stick butter melted
- FOR THE PIE
- 1 container vanilla ice cream half gallon size or 1 ½ quart, depending on the brand you choose
- 1 container orange sherbet half gallon size or 1 ½ quart, depending on the brand you choose
Instructions
- FOR THE CRUST
- In a food processor (or blender if you don’t have a food processor, and if you don’t have either, just crumble the cones, put them in a Ziplock bag and beat them senseless with a rolling pin) process the waffle cones until they become fairly fine crumbs.
- Add the granulated sugar and salt, and pulse until mixed.
- Pour in the melted butter, and pulse until everything is well combined.
- Here’s a decision point: I have made this using both a 9 and 10-inch springform pan, just because it’s easier to get the slices of pie out of there as opposed to using a pie pan, but the choice is up to you. If you’d like to use a pie pan, have at it. If you are using a springform pan, line it with heavy duty aluminum foil, then spray the foil with kitchen spray. If you are using a pie pan, spray the pan with cooking spray.
- Firmly pat between 1 ¾ cup to 2 cups of the crumb mixture into the bottom of the springform pans. I used 1 ¾ cup for the 9-inch springform and 2 cups for the 10-inch. No need to coax the crumbs up the side of the pan if you don’t want to. If you are using a 9-inch pie pan, I’d go for close to 2 cups of the crumb mixture because you are going to want to try to push those crumbs up the side of the pan so it looks like a regular pie crust.
- Set the crust in the freezer for 30 minutes or so to set up. This will make it stay put when you wrangle that ice cream in there.
- TO ASSEMBLE THE PIE
- Here’s another decision point: You can either have a layer of vanilla, a layer of orange sherbet, and another layer of vanilla, OR you can start with a layer of orange sherbet, then a middle layer of vanilla, and a top layer of orange sherbet. Since I was making two, I did it both ways, and I think they are both really good – so it’s up to you which sounds better.
- Take your ice creams out of the freezer and let them get a little soft – this will save your sanity.
- And here’s a trick: Getting the ice cream to cooperate and move to the corners of the pan is a challenge. I first tried it with a knife and got really mad. Then, I put on a pair of cooking gloves (the latex kind you can find in hardware stores or just about anywhere – just make sure it says they are ‘food safe’), scooped ice cream into the bottom of the pan, and used my gloved hands to move the ice cream around. Worked like a charm, and the gloves insulate your hands enough so that you aren’t screaming in icy pain.
- All that’s left to do is start layering. This pie will take close to all of the ice cream, especially if you mound it up on top, but use your judgment and see what looks best to you. If your ice cream starts getting too soft, pop it back in the freezer and firm up between layers so you don’t have too much comingling happening.
- When you are finished with your layers, sprinkle as much of the remaining crumbs over the top of the pie and get it back into the freezer until it’s set up. That’s all there is to it!!