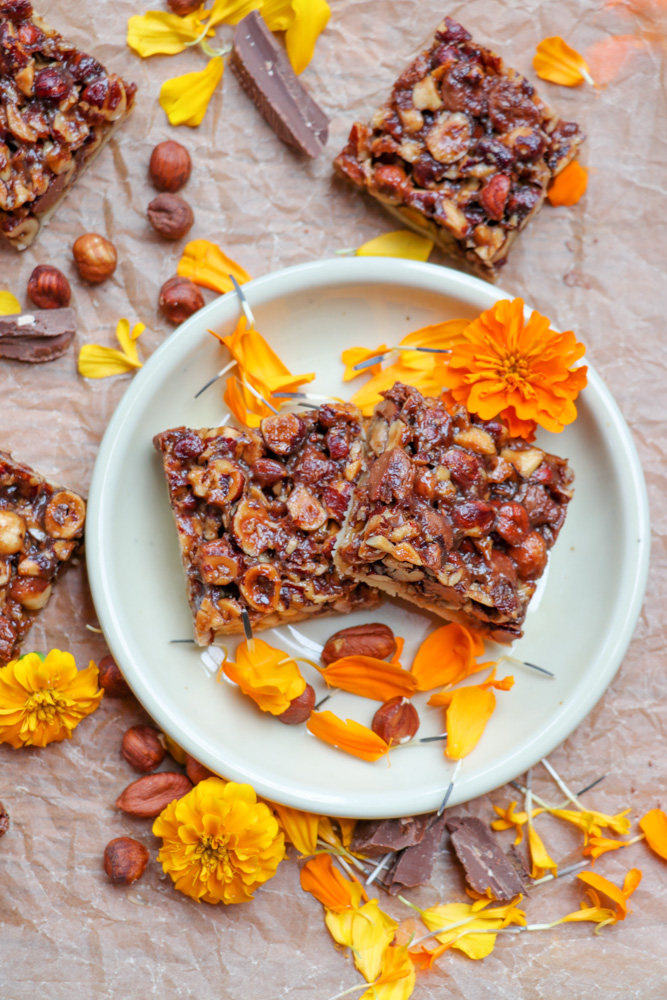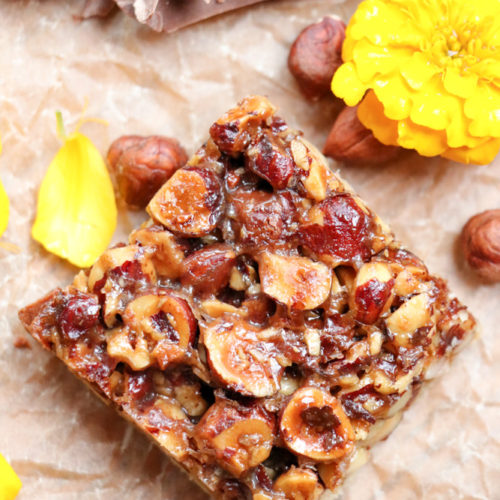
Nutty Milk Chocolate and Hazelnut Bars
It all started because I needed to come up with something fast for our first football tailgate gathering of the year. Hmmm…thoughts circled around a bar cookie of sorts, but it had to be something I could tuck into a Ziplock bag for munching on during the game (you know, if it went on FOREVER). I saw a recipe for Pecan Bars…close, but not exactly hitting the spot. Hey, wait a second! Let’s capitalize on what’s right in our own back yard. Did you know that Oregon is the largest producer of hazelnuts in the world? All the more reason to give them a spin. And so, the Milk Chocolate Hazelnut Bar was born. A thin and rich crust that will remind you a little of shortbread. But the star of this show is the hazelnuts, and there are a ton of them. First lightly oiled, salted, and roasted, and then roughly chopped and stirred into a magical combination of, among other things, brown sugar and milk chocolate. This will blow your mind and I’m not kidding. To make it even easier, all of this can be made in one bowl. No mixer. No food processor. Just you and a spoon. Have at it. This recipe was greatly inspired by the ‘Ultranutty Pecan Bars’ recipe from America’s Test Kitchen’s beautiful book: ‘The Perfect Cookie’. Everybody should have a copy of this treasure, so I hope you pick one up soon.
Ingredients
- FOR THE CRUST
- 1 ¾ cups unbleached all-purpose flour
- 6 tablespoons granulated sugar
- ½ teaspoon salt
- 1 stick of butter melted
- FOR THE TOPPING
- 4 cups hazelnuts
- 1 cup milk chocolate chips
- ¾ cup brown sugar
- ½ cup light corn syrup
- 1 stick of butter melted
- ½ teaspoon salt
- 1 teaspoon vanilla extract
Instructions
- FOR THE CRUST
- Preheat the oven to 350 degrees
- Next, you’ll want to prepare your baking dish. Grab a 13x9 inch baking dish. Line the pan lengthwise with enough aluminum foil to hang over the sides by an inch or two. Now do the same thing widthwise, also leaving a couple of inches of overhang. Spray well with baking spray. This foil will act as a handy sling and allow you to pull your bars cleverly out of the pan so they will be a breeze to cut into squares.
- Now, back to the crust…In a large bowl, stir to combine the butter, granulated sugar, salt, and melted butter.
- Toss the crust ingredients into the baking pan, and pat down so your crust is evenly distributed. Put some muscle behind it because we want that crust nice and firm to stand up to cutting into bars later. Set aside.
- FOR THE TOPPING
- Preheat the oven to 350 degrees.
- The first order of business is the hazelnuts. Line a rimmed cookie sheet with foil (you don’t really have to, but I do it to make clean up easier). Pour the 4 cups of hazelnuts on the foil, and drizzle VERY LIGHTLY with canola or some other neutral oil. You probably don’t need more than a couple of teaspoons worth of oil. Sprinkle with salt, and using your hands or a spatula, smoosh all the nuts and salt and oil together to make sure all is well coated.
- Roast the hazelnuts until they start to turn darker brown and become fragrant. This has taken me anywhere between 15-20 minutes, but start looking at yours at about the 10 minute mark to make sure they don’t burn.
- When the nuts have roasted, remove from oven and let them sit for about 10 minutes.
- To chop: Place a double thickness of paper towel on the counter top. Scoop up about 1/3 of the roasted nuts, and using a heavy knife, roughly chop the nuts. All this will take is running your knife slowly lengthwise, then crosswise through the nuts. Since they will still be warm they will slice easily, and the paper towel will prevent them from sliding all over the place. When the nuts are chopped, make a sling out of the paper towel and pour them into the large bowl you already used to make the crust, or any other large bowl you may have hanging around. Repeat this process until you have chopped all the nuts.
- To the nuts in the bowl, add the chocolate chips (you can roughly chop these too, but you don’t have to if you don’t want), brown sugar, light corn syrup, melted butter, salt, and vanilla extract.
- Stir to combine everything, then pour this mixture over the crust you have waiting.
- Press down gently but don’t get too carried away – your topping will be much prettier if you leave some appearance of texture on the top.
- Bake at 350 for about 25-30 minutes. Bars will be done when they show bubbling all over the top of the bars. NOTE: They don’t have to be bubbling like crazy in the middle, but a few bubbles here and there are necessary.
- Remove from the oven and let cool for at least 45 minutes. Lift the sling out of the baking pan and allow everything to sit a little longer until the bars are at room temperature.
- OK, you’ve waited long enough. Cut into bars and enjoy!!